Tuesday 29 November 2011

Tuesday Tip of the Day


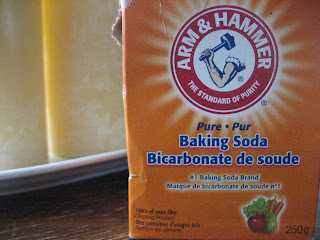
     It's baking time! Time to pull out your Christmas apron and treat yourself, your friends and families to all of the delicious treats the holiday season brings.  Quite often for people who don't bake regularly, baking powder and baking soda shuffle their way to the back of the cupboard to hide in the shadows until they are needed and searched for.  If you have wondered whether or not the powder or soda you have are still good enough to do their jobs, here are two easy and quick ways to test them for effectiveness.

**Baking Powder,  Mix a teaspoon of baking powder with a few tablespoons of warm water and the mixture should begin to bubble rapidly.  If it does not, then the powder has reached a point where it needs to be replaced with fresh product.

**Baking Soda, Mix a teaspoon of baking soda with  a few tablespoons of vinegar and the mixture should begin to bubble rapidly.  If it does not, then the soda has reached a point where it needs to be replaced with fresh product.

These two quick ways to check the freshness of your baking products can also be fun experiments to share with your children to show chemical reactions in the two powders.

With it being the holiday season, many of us will be breaking out our baking pans for breads, cookies, cakes and pies....what better time than now to make sure your baking powder and baking soda are up to the task?  Don't wait till the last minute when some wonderful baked item didn't rise the way you had hoped to know that you should have replaced one or the other or maybe even both.  Test them ahead of time so you'll know if you should add them to your list of  the other goodies you'll be stocking up on for all of your holiday treats.

I hope you find this Tuesday tip helpful : )

Monday 28 November 2011

Whipped Cream


     Whipped Topping for desserts

1 cup heavy cream
1 tablespoon confectioner's sugar
1 teaspoon vanilla extract

Using chilled beaters in a chilled glass bowl, whip with an electric blender, the cream, sugar and vanilla until stiff peaks form.  Delicious!


Saturday 26 November 2011

Crispy Mashed Potato Cakes


     A great way of using leftover mashed potatoes is to make them into crispy potato cakes.  My mother has always done this and throughout the years I have naturally followed in her footsteps.  I had some red skinned mashed potatoes mixed with chives leftover from before Thanksgiving and not wanting them to go to waste, I created this old standby as an add-on for today's lunch.


Crispy Mashed Potato Cakes

Mold mashed potatoes into an oval patty form about an inch thick.  Dip patty into a beaten egg wash and coat with bread crumbs.  Fry in melted butter on medium heat until a nice golden brown color.  Place cooked patty on a separate pan and place in an oven preheated to 250 degrees to keep warm while you prepare any other patties you are making.

Enjoy with a dollop of sour cream.


Wednesday 23 November 2011

Chana Masala, A Chickpea Curry


     I have never been fond of shopping, I am one of those people that like to get in, get out and get on with the rest of my day.  Sometimes though I get lucky and find myself in a place that makes shopping not only interesting, but fun as well.  One of my all time favorite shopping trips had to be to the local Indian Spice store.  Referred to the store by a friend for all of the spices I needed for a homemade curry, I certainly found myself in a spice haven.

     I bought so many little treasures in that store I had to find a special cupboard to put them all in.  I like to have them in their special place as they are very fragrant and I like to be able to grab what I need without having to rummage around all of my favorite day to day, go-to spices such as oregano (this is my fastest moving spice next to pepper and salt).  Don't get me wrong, I love all of them equally, it's just I don't make curries as often as other dishes and really, there are so many other darn things already in my cupboard, there really just wasn't enough room.  I would love to have a space stocked with all of the yummies I use when cooking like on the show, Chef at Home with Michael Smith.  I linked a random 29 second YouTube video to give you a peek into his pantry : )

     Anywho...that day, in the store, things changed for me.  It opened a whole new world to me...a world of curries, a world of exotic fragrances and delicious dinner choices.  I was even lucky enough to have the owner share two recipes with me, one for a chicken curry and the other, well...for chana masala of course, the entire reason I am typing this post : )  This happened several years ago and the recipe he shared, I scribbled it on a small scrap of paper that saw the trashcan long ago.  I have adapted it many, many times, and even last night I made it again a little different.  I threw in something I thought was slightly odd, but darn it all, I do believe it was the best I have made yet!

     Although there may be what looks like a long list of spices and ingredients, don't be scared off as I promise this will turn into one of your favorites.  When only a couple of years ago I had never in my life made a curry, I now make them, love eating them and hope sharing them with you will encourage you to give it a whirl : ) 

     One of the things that really was impressed upon me from the store owner was, 5+3.  Five basics and three add ins that he always used to make his curries.  I stick to that and of course, throw in more when and where needed depending on what I'm cooking. 

The 5
  1. Paprika
  2. Cumin Seeds
  3. Garam Masala
  4. Curry Powder
  5. Coriander seeds or Coriander powder
The 3
  1. Cinnamon Stick
  2. Clove
  3. Black Cardamom
  

The Cumin seeds soften as they cook

You'll remove these Cardamom pods before serving

You'll also remove the cloves before serving.  The Coriander seeds will soften while cooking, crush them with the back of a spoon.

I ran out of Cinnamon sticks and when I went shopping recently, I could only find Cinnamon bark.

Mince the Garlic and Ginger.  This powder is the Garam Masala.

I use an Indian Paprika and use a mix of Hot Curry Powder and Medium Curry Powder.

I use a pinch of Hing (Asofoetida) to help with digestion.

Everything here looks so yummy : )

I soak my canned Chickpeas in enough hot water to cover them and in the juices from the can with two tea bags.  Regular black tea is best.  You'll drain the chickpeas before adding them to your paste but be sure to save the liquid.

Heat a few tablespoons of oil in a pan and toss in your 5+3

Add in and saute until soft, your onion, garlic and ginger.  Add a small can of tomato paste and heat through for approx 5 minutes.

It will form a nice thick paste. 

Add fresh tomato/canned stewed tomato or a can of tomato soup.  Mix in about half of your reserved chickpea liquid with the drained chickpeas.  Let this mixture cook until it is the thickness you like adding your reserved liquid to it or water if needed to thin it a bit.

This is a packaged spice mix that contains a few ingredients you have already used and a few you have not.

Add the Chana Masala spice blend after the mixture is simmering and allow it to cook.  It is not vital, so if you don't have it, you can skip it and just add

I like my Chana Masala slightly thick, and although the dish is usually called a dry curry, I love a sauce I can smear into my rice and use my naan bread on.


Beer is great with curry! Yummy delicious to the last bite : )


Chana Masala Recipe

2 tablespoons of each
Paprika
Curry powder
Cumin seed
Coriander powder or 10 seeds (crushed)
Garam masala

4 pieces of each
Cinnamon stick
Black cardamom pods
Black cloves

One small pinch of Hing
2 teaspoons of Chana Masala spice blend
1 teaspoon of Amchur powder (optional)


2 inch piece of ginger, peeled and minced
1 small onion, peeled and chopped
4 cloves garlic, peeled and minced

2-3 tablespoons oil
1 small can of tomato paste
1 large can of stewed diced tomatoes/2 chopped fresh tomatoes or I used for the 1st time & loved it, believe it or not......a can of condensed tomato soup (the soup was my "odd" ingredient from my note above)
1 can of chickpeas
2 tea bags

Place chickpeas in a pot, add enough water to cover, approx. a cup or two.  Simmer with two tea bags, this will add a lovely dark color to the chickpeas as well as a nice flavor.

Heat oil in a pan, saute the 5+3 spices and the pinch of hing for one to two minutes until warmed and fragrant.  Add onions, ginger and garlic and cook a few minutes until onion is soft.  Add tomato paste and cook until mixed in and warmed through.  Add drained chickpeas, add your choice of tomato and about half of your reserved chickpea liquid.  Simmer 10 minutes adding reserved chickpea if needed to thin curry.  Add Chana Masala spice blend and mix in.  Add Amchur powder if using.

Simmer till ready.  When you have reached a consistency that you like, not too thick-not too thin, You can always add more reserved chickpea water or if you have used it all, add water.  The longer it simmers, the more it will thicken.  Remove the cardamom pods, cinnamon sticks and cloves before serving.

Serve over Basmati Rice

Delicious!

Tuesday 22 November 2011

Tuesday Tip of the Day-Using Baking Soda-Easily Clean Burnt, Stuck on Food from your Pans, Pots & Dishes


     Arm and Hammer Baking Soda has to be one of my favorite cleaning products.  It is a clean, simple, unscented cleaning agent that a lot of people use strictly for baking yummy treats in their kitchens.

     There are so many ways to use this product.  Last Tuesday's Tip of the day showed a way to use this product to clean scorched carpet off your clothing iron by making the soda into a paste.

     Always in my refrigerator, it is a handy go to product I use quite often.

     If you have ever burned something in your favorite pan or pot, then you know the concern there is surrounding cleaning it without damaging it.  When I was growing up, the simple solution was to let the item soak with soapy hot water overnight, and to hope for the best the next day when the time came to clean it.

     Today, there is a simpler, quicker solution to this problem.  Sprinkle Baking Soda on the dampened surface of the burned, scorched area.  Let the dish sit for at least 15-20 minutes and then using a regular dish cloth or gentle scrubbie, clean the area.  You may have to repeat the steps, but you will find that this is an amazing way to restore the beauty of the pot or pan you might have previously written off as headed for the trash.  Forget boiling, scraping, scrubbing, countless hours of soaking, or just throwing away this problem, use baking soda.  It's silky, smooth powder not only removes the burned on food but leaves your dish, unscratched and shiny like new.

     It's not just for baking and keeping your frig fresh anymore, it has a ton of great ways to be utilized all over your kitchen : )  Are you using Baking Soda for something other than cooking? Do you have a great tip to share using this product? Feel free to leave a comment and share your tip of the day : )

     I hope you you find this Tuesday Tip helpful : )


     I could go on and on each week about a different use for Baking Soda in your home, but as there are hundreds of ways to use this product, I will move on to something else next week for my weekly Tuesday Tip.

Have a Great Thanksgiving!
   

Monday 21 November 2011

Chicken Cordon Bleu


Chicken Cordon Bleu with garlicky roasted squished baby potatoes and cheesy cauliflower


Start by covering your chicken breasts with plastic wrap or wax paper layed out on a flat surface.  Pound them flat with a rolling pin until they are thin, about 1/2-3/4 inch thick.

Season with salt and pepper.

Lay a small bundle of shaved ham on one side and cover with one slice of Swiss cheese folded in half.  Fold the opposite side of the chicken over the filling and press the edges around the chicken forming a small package.  Season flour with salt and pepper and dust the chicken packages in the seasoned flour.  If your packages seem like they might not stay together, use kitchen twine or toothpicks to hold them together.


Season bread crumbs with salt, pepper, and chopped fresh parsley.


Dip your floured chicken packages in an egg wash (1 egg beaten), and coat them in your seasoned bread crumb mixture.

Heat a skillet with a bit of olive oil and butter until butter is melted and hot.  Place chicken in pan and cook until they are a nice golden brown on each side.  Place chicken in an oven set at 300 degrees until they are finished cooking.  This won't take too long as you have already cooked them until a golden brown and the chicken is thin, since they were pounded flat.  A good temperature is between 155 and 165 degrees and there should be clear juices from the chicken, never pink...still pink? cook a little longer.  If you press a finger against the chicken, it should give a bit and not be too tough, this is a good way to be sure you are not overcooking the chicken and making it dry.


I served my chicken with my garlicky roasted squished potatoes and cheesy cauliflower.

They were delicious.


Friday 18 November 2011

Friday Funnies


You Can't Stuff This!

Adam Sandler's Thanksgiving Song

You Can't Gobble Me

I Will Survive

Happy Thanksgiving
I Hope you have a blessed and bountiful holiday

Thursday 17 November 2011

Sharing with Others


     I recently received an invitation to be a part of, PetitChef


     It is a website where they share thousands of delicious recipes, daily meal plan ideas, and a list of food blogs you can visit as well.  You can even share your own favorite recipe you make at home while browsing through the enormous amount of recipes they offer.  Their directory offers a whopping twenty one different categories for you to choose from to find the food blog that fits your needs.  It has a search engine if you are looking for a specific recipe or even just a dish with a specific ingredient, which I quite often do.

     Being new to the blogging world myself, I am happy to be a part of PetitChef where I can share my recipes with others, and where people searching for yummy dishes can have the chance to find my food blog.  Hopefully, their visitors will find their next favorite dish while reading through everything there being offered.  I look forward to the alliance with PetitChef, and the opportunity it may bring to meet new people who love to cook and enjoy good food.

How to find me on PetitChef?
Ck out this link to find Cookin' in my Kitchen...http://en.petitchef.com/foodstuffs-cat-2

     You can go directly to Petitchef by clicking on the link above in the first paragraph or by clicking on their logo on the right side bar of this site. 

     You can also find us both on Facebook as well, and hopefully LIKE what we are doing there : ) Thanks for stopping by and happy cooking!

Cookin' in my Kitchen  on Facebook
PetitChef on Facebook

     Just my (unsolicited) way of saying...Thanks!

Wednesday 16 November 2011

Ratatouille Proven&#231ale


     A couple of weeks ago we enjoyed a lovely dinner party with good friends.  A Greek inspired dinner followed by a rousing, hilariously fun card game was enjoyed along with delicious homemade Pastel de nata treats brought by one of our guests and Baklava.

     The next day and for awhile after, there was one lonely eggplant hanging out in the fridge that had not been used that evening.  Inspired yesterday by a fellow blogger, Masala Herb, it was an easy decision on what to make.  We had everything we needed in the house for it besides the zucchini, which was easy to pick up at the grocer.

     Ratatouille, served as a vegetable side dish to accompany our 2lb-1 rib standing rib roast was a perfect companion.  We bought this roast on sale : ), which by the way I will blog as well due to the fact that it is nearly impossible to get cooking times for such a small roast online, but how much do two people need? right?, I mean it wasn't a holiday...although, eating it always feels like a holiday : ) 

     Not very time consuming to make and altogether completely satisfying, I hope you try this beautiful vegetable dish as either a main course, side dish or even an appetizer.  Thank you to Remy who originally started it all and has had me making this dish ever since.


Peel an eggplant and cube into one inch pieces.  Peel a few strips off of a zucchini and cut into one inch cubes.  Heat 1/4 cup Olive oil in a heavy bottomed pan, cook eggplant and zucchini until lightly browned and somewhat soft.  Remove from pan and set aside in a bowl.

Still in the cooking process, not quite done.
Peel and slice an onion.  Cook in 2 tablespoons of Olive oil until soft but not brown.


Add 2 Bell peppers, cut into one inch pieces.  Red, Green, Yellow-whatever you have and enjoy.  Add 3 small cloves of minced garlic and cook with the onions and peppers until soft. 

Salt and Pepper the onions and peppers to taste.

Add diced fresh tomato, or as I did...use a large can of stewed tomatoes and dice them up, drain the juice from the tomato and cook with the vegetables.  Add one Bay leaf and some Fresh Thyme (1 tsp), if you have it (I only had dried).  Add the eggplant and zucchini back into the pot and cook for about fifteen to twenty minutes until everything has melded together nicely.  In the last few moments of cooking, add fresh cut Basil (I only had dried so I added it a little earlier to give it a chance to soften and aromatize the stew).  Remove the Bay leaf : )

 Serve on a plate that really showcases the different colors and enjoy.
Delicious!


Tuesday 15 November 2011

Tuesday Tip of the Day, Using Baking Soda-Clean Scorched Carpet from your Clothing Iron


     Normally, I do all of the ironing in the home, but as luck would have it, I got the day off yesterday.  Everything was going well until I heard a fair bit of cursing from the other room following a rather loud thud.  Well : ) turns out the iron took a flying leap off the ironing board and stayed on the floor only long enough to leave a fair bit of carpet seared to the surface of the iron.

     Buy a new iron? I don't think so...is there an easy way to clean this mess off without damaging the surface of the iron? Yes,

     Tuesday Tip, Clean Scorched Carpet off your Iron.

     On an old cloth, sprinkle baking soda into it, add enough water to produce a thick paste and rub onto the cold iron.  Scrub paste across the surface of the iron until the carpet residue has come off (only takes a few minutes).  It is a lot easier than some might think.  Rinse the wash cloth and clean any remaining soda paste off the surface of the iron, making sure that any steam holes there may be are cleaned out.  Heat your iron, and iron an old cloth to be sure everything is off of the iron.  Your iron is now cleaned and ready to be used normally again.

     There is no need for harsh chemicals or scratchy cleaning products when something as easy, silky and smooth can be used to clean the surface of your iron leaving it...as good as new.

     I hope you find this Tuesday Tip helpful : )

Sunday 13 November 2011

OCD, Taco's and What's in your door?


     Sometimes I get something stuck in my head and find it just rolls around in there...and rolls, and rolls, and rolls.  One particular time in my memory was with taco's.  I craved a taco for over a week, maybe even a few, trying to eat healthy, I wouldn't allow myself to go grab one to satisfy the urge.  Resulting in this overwhelming preoccupation with the idea of taco's, I thought of them all the time.  Confiding in a friend of mine and asking what the heck could I do to clear the thought outta there, they laughed and said...go eat a taco!  It worked : ) I ate the silly taco, it was yummy, and the stalking taco thoughts went away.  It was an important lesson in life as well that I remember, and still use to this day.

     As a newbie to the world of Twitter and blogging too for that matter, I find myself browsing other people's tweets and reading blog post's.  One of the posting's I recently ran across has been on my mind a lot since, as it was fun, funny, quirky, and really...I just thought a pretty interesting idea.  Well, today I decided to get it over with, and make one myself.  A hashtag, a title, and a photo...and I was on my way...

     A thanks to http://www.irishfoodbloggers.com/tag/foodie-fridge-flash/ has to go out, as it is where I found the fun post, originally from http://marriedanirishfarmer.com/.

     Today my Tweet to the world was #whatsinyourdoor?  And here is the picture I posted with the response, Not enough room!  Now I can let it go, and move on to other things : )

Thursday 10 November 2011

Homemade Butter and Compound Butter


     Making homemade butter is a lot easier today with modern technology.  Do you know how to make whipped cream? Then you know how to make butter! : )

     Start with a blender or food processor, I used my new food processor.  Start by pouring heavy cream I used 33% Whipping Cream) into the machine.  Turn machine on to a constant pulse and walk away : ) It's that easy.


     After about 7-10 minutes depending on your machine, you will start to see small yellow blobs float to the surface.  The first thing you will notice of course, is that you have made whipped cream.  If you allow the machine to continue past this point, the cream will develop into butter.  Skim off the top of the cream, the thick layer (butter). 


This pic really makes the butter look a lot more yellow than it is...not too much I could do, the other photos are a better representation of the color : )   It's because of the light from the stovetop hood : )

     You'll notice that it has a grainy appearance, that's okay.

     Place butter into a wire mesh colander and let it drain...what drains off is buttermilk.  I used my buttermilk to make fried chicken : D

     Using the back of a spoon, mix the butter around and cream it together to remove more of the buttermilk.  Using your hands, squeeze the butter to release more of the buttermilk, rinse in cold water as this will also help to release buttermilk.  It only takes a few minutes in total before you have a nice creamy butter.  It is so much fun to make and so rewarding when you have your finished product.  It is delicious and fresh tasting, beats store bought any day of the week ; )

     For compound butter, mix your choice of chopped herbs, spice or whatever you like into the butter to flavor it.  I used chopped Parsley and chopped Chives.


     I made two portions with the herbs, one portion with the herbs and a small minced clove of garlic, and left one portion plain.  I only slightly salted the three portions with the herbs and left the plain butter, unsalted.  Leave the butter out wrapped in saran wrap for about one hour at room temperature to let the flavors blend into the butter.


     For a dinner party, I made homemade bread and wanted the homemade butter to go with it.  I took the compound butter I had with the garlic in it and molded it into a log shape, wrapped/rolled it into the saran wrap, using a ruler I pushed the saran wrap tight horizontally length wise against the butter.  It worked like a charm and made the log shape into a tight little bundle.  Twist the ends like a piece of candy and place into the frig until needed.  Using a sharp knife, and rinsing it in hot water, I sliced the log of butter into coin shape pieces, remember to unwrap it first from the saran wrap of course.  I was really amazed as this was my first time making butter-and it won't be the last!


     The other two herb compound butters were smeared semi flat on the plate, set in the freezer for a few minutes to harden and using a melon scooper (run under hot water so the butter doesn't stick to it too much) I made little butter balls, placed them into pretty glass jars and gave them away as gifts to my dinner guests as they were departing.

Truly, it was tons of fun!


JWsMadeWLuvMondays
Related Posts Plugin for WordPress, Blogger...